
During this lesson you will learn how to mark rows in tables to make them easy to work with and create notifiers (reminders).
Color Formatting
Color selection used while working with tables improves efficiency. For example, you will not have to look at the value of the field every time if the groups of fields are marked in color based on their importance.
Let’s try to apply color formatting to "Tasks" table in our online database. It contains "Priority" field which takes one of the following values: high, normal, postponed. Ensure, that all tasks with high priority are color-marked. To do it, open the settings and click formatting located opposite to "Task" category of "Tasks" table.

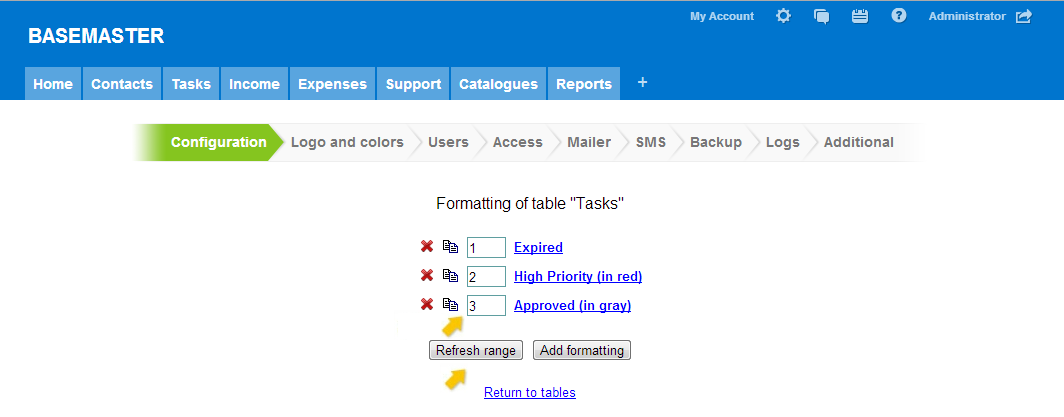
After that you'll see "Formatting of table "Tasks" window. Then click button "Add formatting"
Creating format window will be displayed. Set the format as well as the conditions for applying it. In the drop-down list, select Priority field, and then equal to. The priority of the field must be High. This kind of trigger is the simplest one in the online database. Using And or Or next to the drop-down list with selected High you can add extra triggers for different fields of the online database. You may also use the expert mode to set the triggers manually by means of SQL. We will discuss it in more detail in Lesson 7.
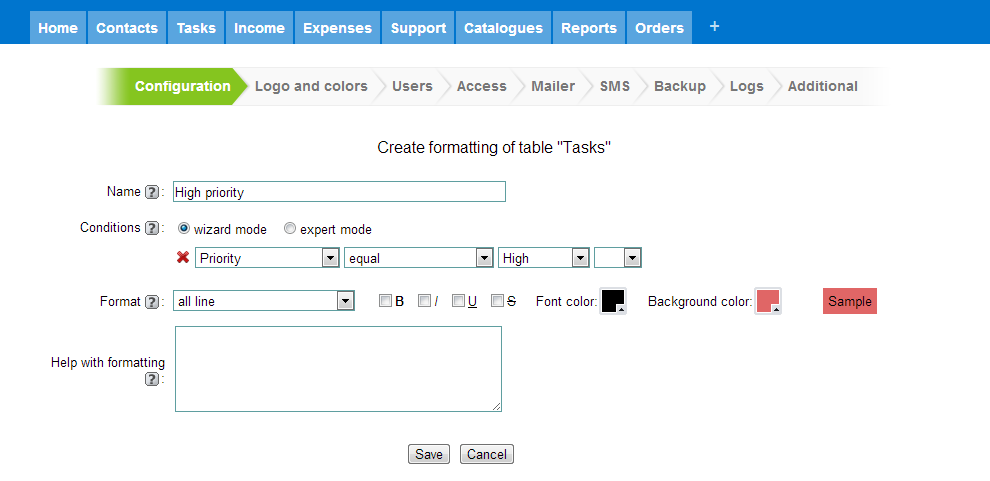
Besides, you can select to mark the whole row or just one field, as well as set the style and color of the font and the color of the record. The sample located on the right panel will show you how the text in the table will look like.
Now let's save these settings - just click "Save" button.
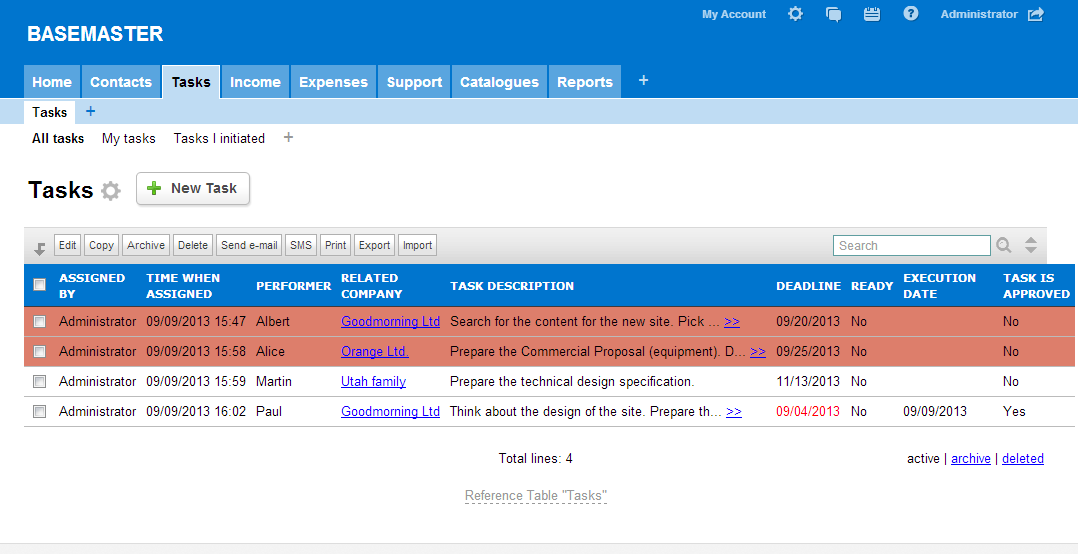
Switch to "Tasks" table to check the changes. If your table does not contain any records, add several tasks with different priorities. All high-priority tasks will be color-marked and they will be clearly visible in the table.
NB! If any table contains several color formats and their triggers overlap each other, it is necessary to set their order in the general list of formats. The format with higher sequential number (located down the list) will have the priority. For example, if you add one more format to Tasks table, which will mark with grey color those records whose Approved field shows ‘yes’. The record with high priority and Approved field will be marked with grey. You can change the priority of formats by changing the sequential numbers of formats and clicking "Update the order" (Refresh order).
Creating a reminder
Reminders are short messages which pop-up under certain conditions. Your employees can use this feature to find out about new tasks assigned to them as well as about upcoming deadlines, etc.
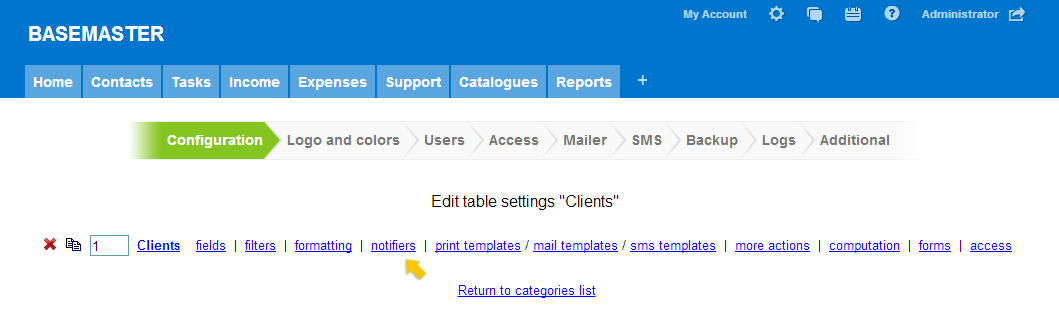
During Lesson 4 we created "Tasks" table. After it you were given a task to add Manager field to this table. Today, let’s create a notifier (or reminder) for the manager to see a new client assigned to him/her. Open Settings/Configuration. Select "Contacts" category and then "Clients" table. Click "notifiers".
Then add a new notifier, enter its name and set triggers. The procedure is the same as in case with adding formats. To make the notifier active when adding a new record, select {new record} in the drop-down list. This option will switch on the reminder for all users. To make it visible for the manager (to whom the task has been assigned), add one more trigger. Click and => Staff => equal => {current} (in other words, Staff field shows the manager who is currently in the program).

So, the trigger has been set. Now it is time to prepare a text message for the reminder. You can insert sample fields. To do it, position the cursor to the place you want to paste the field value in, then select the field template you want to paste and click OK.
After it you can set the background color of the message. Besides, the message can not only be displayed at the top of the table, but also sent as an e-mail. But in this case you will have to define extra parameters for the mail-out. Furthermore, you can configure the deletion of notifiers if any of the triggers becomes null as well as to make it pop up again after closing.

So, you created a notifier. Now save it. Switch to "Clients" table and add several new clients. After it assign them to different managers ("Staff" field in the basic configuration). To see how the reminders work, assign a new client to yourself.
Thus, we learned how to set color formats and create notifiers. During the next lesson, we will consider selection of different data from the table under certain conditions and search for data in tables.
Task. Get back to Lesson 4 and add Status field to Orders table. Create a notifier Order closed shoring the Order No. This reminder must activate when Status field changes to Closed.