
Here we will study the interface, complete company profile, learn how to upload a logo, customize color scheme and add employees.
What can this program do?
Now that you created a free account we can proceed with introducing the program.
What is it all about? How can it help me with automating my business? What are the following steps dedicated to?
Basemaster is a multiuser web-oriented and easy-to-tune system for automating one's business.
Using the standard configuration you can create online databases, store the client data and history, distribute clients among employees, issue invoices, accept applications, distribute tasks among employees, review reports and logs, perform mail-out using e-mail, receive reminders about interesting events, etc.
The main advantage of our program is intuitive user-friendly interface and flexible wizard that help us to be always a step ahead of our rivals. Using this wizard you can easily and without any programming and all that stuff create tables, fields, reminders and filters as well as access groups, templates (PDF, RTF, ODT, HTML) and many other things which we consider later. The majority of products offered by our competitors feature functions with the help of which you can only add extra fields in tables, for example. We offer you a new solution. Using our program, you can create any table you need and add fields of 8 different types (text, number, list, link, data, file, image, user, etc.) That is why you can always develop Basemaster along with your business.
Now let’s talk about this in more detail.
Below you can see how the interface looks like:
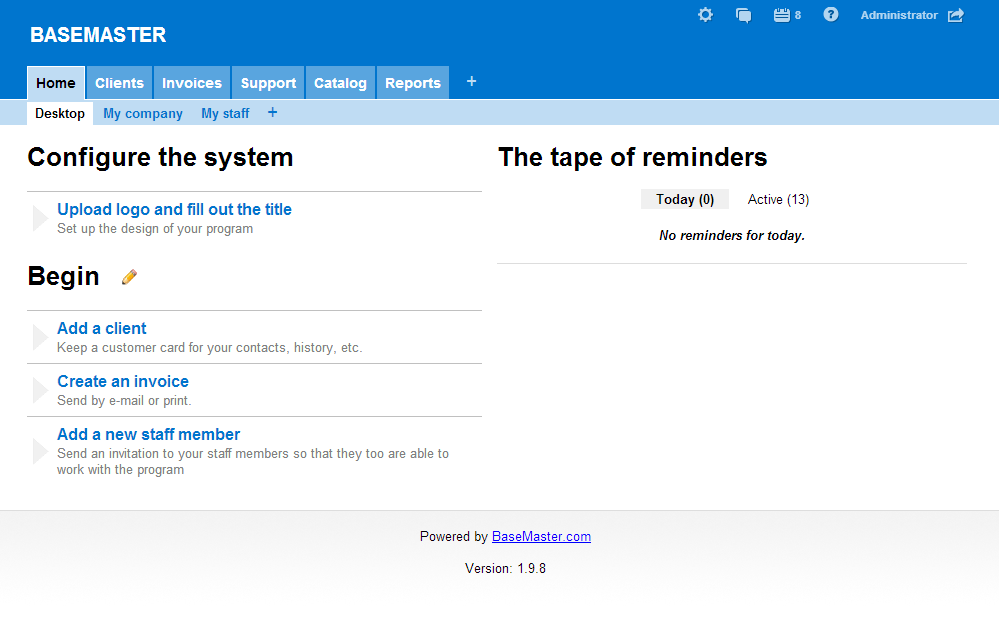
Figure 1. "Home" category. "Desktop”.

Figure 2. “Clients” table.
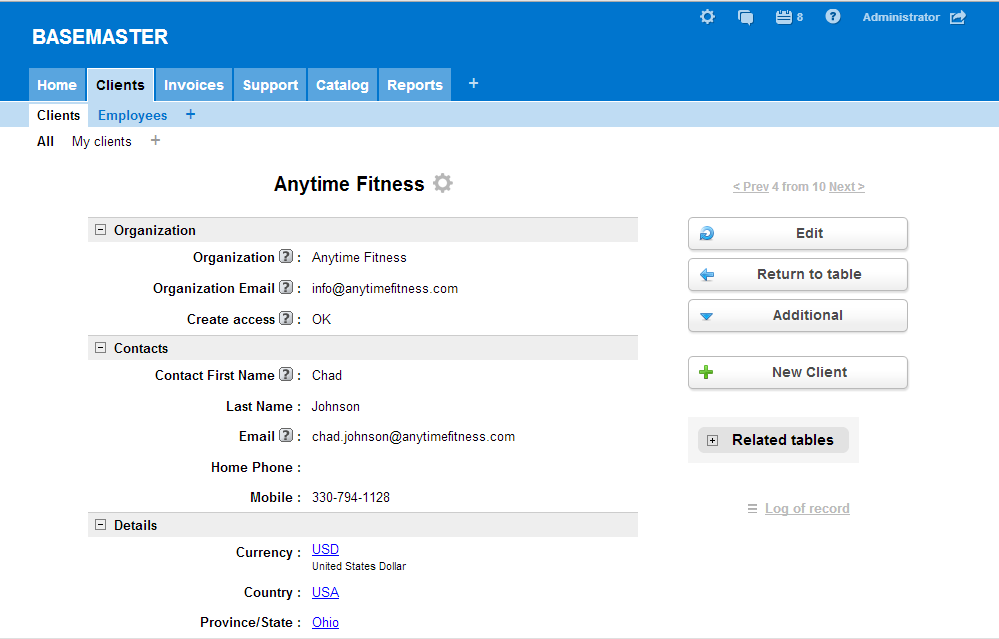
Figure 3. View a record in “Clients” table.
We made such simple design intentionally so as nothing could distract you from work. All data starting from the list of clients and to tasks assigned are tabulated. Unlike common electronic tables, here you can open each record to view those fields that are not displayed in the main table, as well as those that are shown in the table and fields inside each record which the admin assigns to particular group of users. Besides, the admin can add, delete and modify any fields in a table, even create his/her own tables and categories.
All tabs in the program are divided into two types: tables and reports.
Table here stands for tabulated data.
Report here stands for data in any other format which you can make on your own. This can be, for example a report, graph, calculator or any other tab.

Figure 4. Standard view of a table.
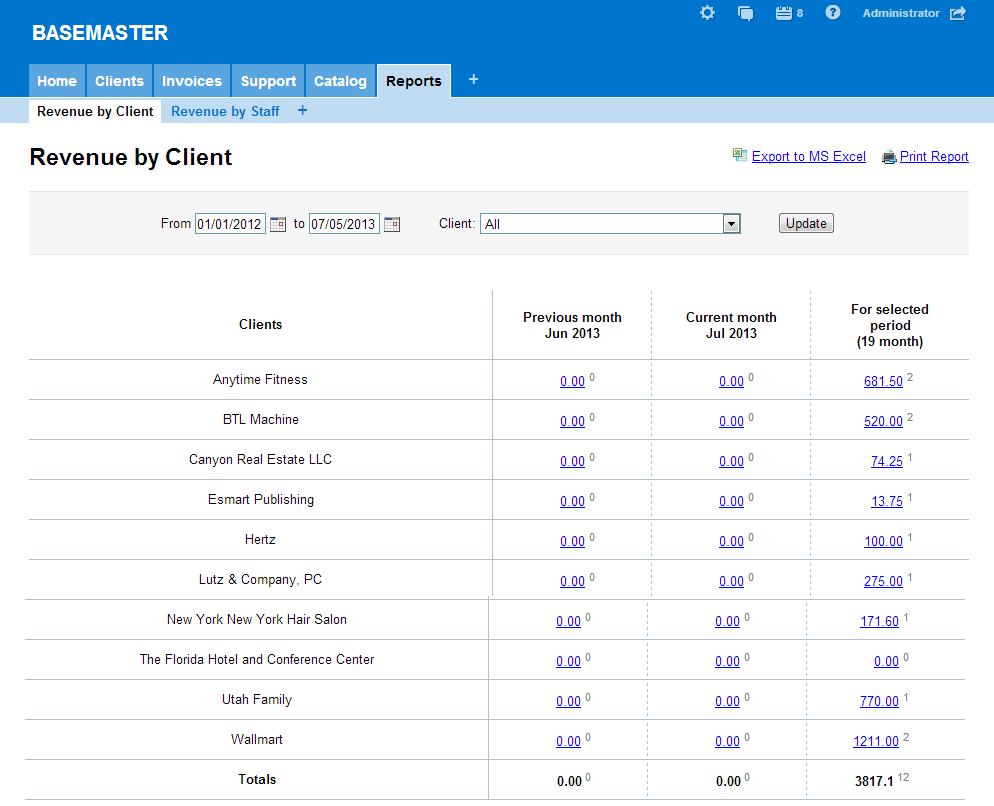
Figure 5. Standard view of a report.
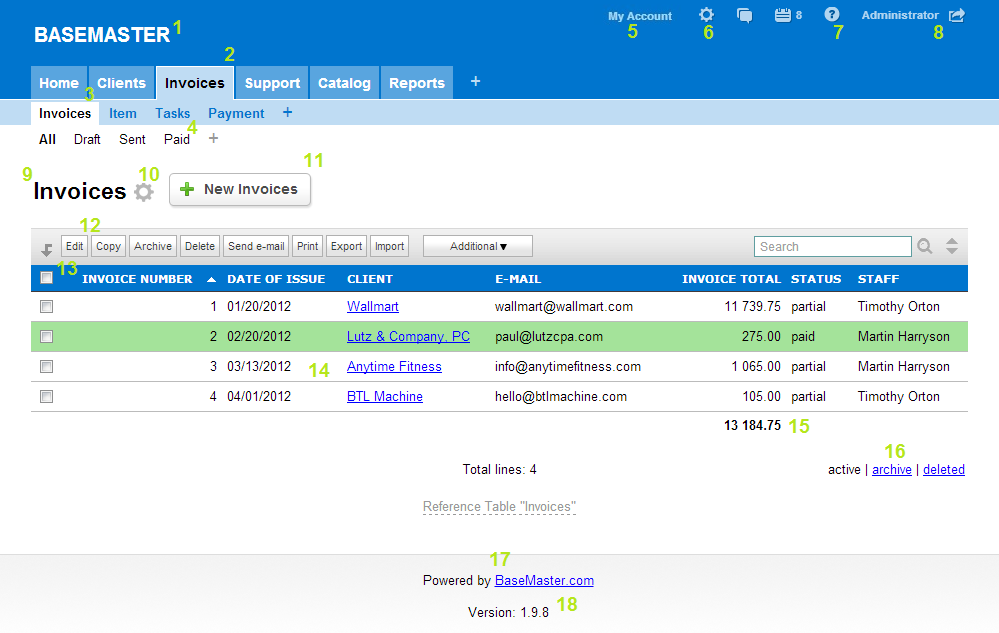
1. Title of the program and logo. Here you can upload the name and logo of your company.
2. Tables' categories. For convenience, you can group tables by categories.
3. Tables. Tables with data.
4. Filters. Data selection with different conditions. For example, in “Clients” table you can filter data in the following way: new clients, key clients, my clients and so on. The admin creates and edits filters in the settings of the program.
5. User’s account (only for SaaS solution). In “My account” you can select the tariff plan, pay for your account and view the statistics of account utilization.
6. Settings. This is one of the biggest tabs. It contains numerous subtabs about which you will learn gradually from further lessons.
7. Help. Contains help data about fields of your system. Admin may create and edit the help for other users.
8. User name and exit. This shows the user name that you used to log in. By pushing Exit you will get back to Log-in and Pass window so that you could log-in under another user.
9. Table name.
10. Gear icon. Quick switch to editing the setting of the current table. You can use this feature only in developer mode.
11. "Add a row" button. Using this button you can add data in the current table. Admin can change the name of this button.
12. Buttons for different actions to the rows. Use Copy, Add to archive, Delete, Mail-Out, SMS, Print Out, Export, Import and Extras manage marked strings in the table. The admin may customize the button view for different groups of access.
13. Table fields.
14. Table rows.
15. Sum (calculated automatically). This feature will calculate the total value of Number-type fields. The value on the current tab will be in black, and the one on all tabs will be in grey.
16. Switch: active, archive, deleted. Rows in the program have three states: active, archived, and deleted. Once the row is deleted, it is marked as Deleted. The deleted rows can be discarded by the admin only.
17. Link to the site Basemaster.com.
18. Version number.
Fill in company info
The first thing we should do is to fill in your company info.
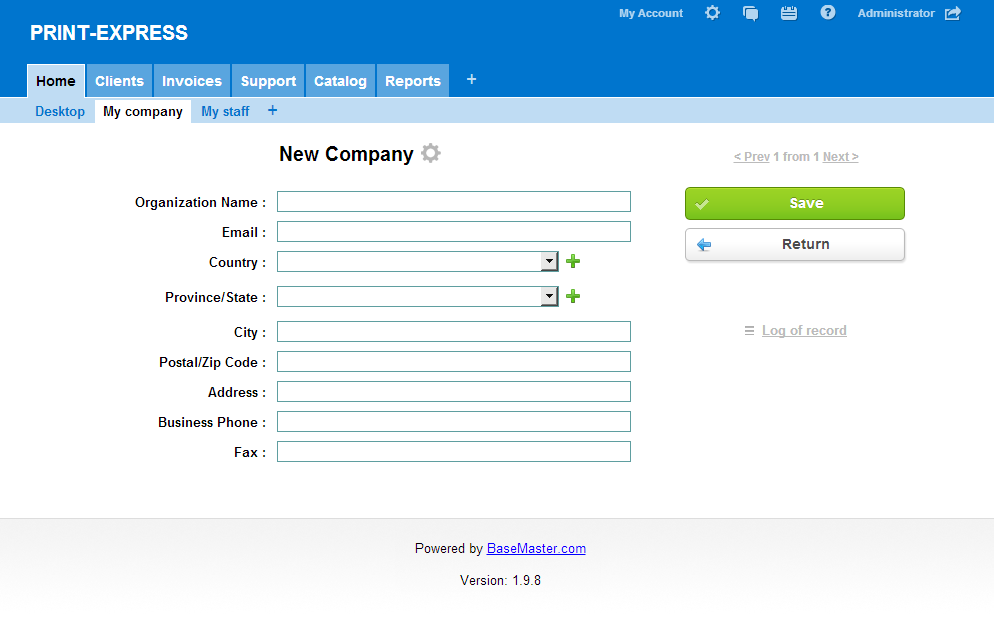
Open “Home” category and then “My company” tab. After it, click “+ New company” button. Now complete the table with info about the company.
Enter the name of the company in “Organization Name” field. The data entered in other fields will be automatically shown in all documents which you will issue (invoices, contracts, etc.)
Note. As regards your company, you can add any number of names. Very often one company operates several legal entities, for example, Company A, B and C. Enter all names in “My company” table, completing banking details for each of them and loading the relevant stamps and signatures. Afterwards, when issuing documents, just select the required company.
Uploading logo and customizing the color scheme
It is always a pleasure to operate a system that fits your corporate style. Let’s upload your logo and customize Basemaster according to your corporate colors.
To upload document, select the gear icon in the top right corner then click "Logo and colors”. Select a file with logo from your computer. The size of the uploaded logo will correspond to the size of the file. That is why, if you need a small logo, change the size of the file. This feature supports the following formats: JPG, GIF and PNG. If you need a logo with transparent background, prepare the relevant file.
To change the color scheme of the system select one scheme or customize a personal scheme.
Now when the color scheme and logo are uploaded we can get down to clients.
Add a new client
In the standard configuration all tables are empty. Let's take clients as an example to learn how to add records to the tables.
Go to Clients => Clients, then click “+ New client” button.
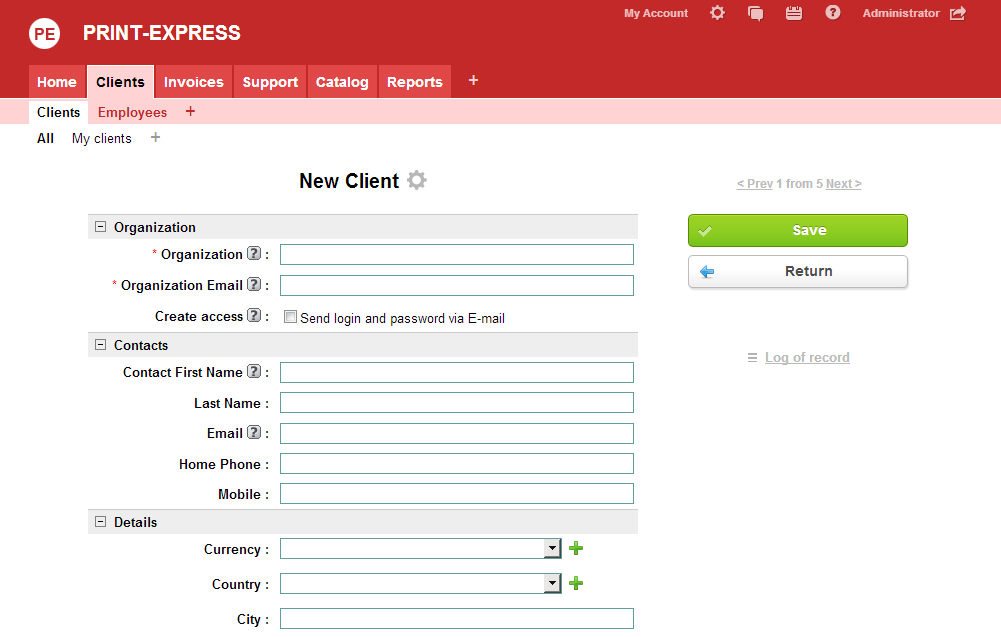
Let’s complete the primary fields about the company. The procedures is the same as before. Contact person field contains and empty list and ‘+’ mark. This is a link-type field. It means, that it takes values from another table, namely, Client’s employees and since this table contains no data, the list is empty. To complete it, if necessary, click Save. One it is done, we have extra fields which can be also filled, if you need it. The fields are not displayed when the record is added. This is done to make the process of adding a company simple and fast. Using settings the admin sets out fields to be completed during adding and fields to be completed during editing.
Add employees
One of the advantages of our company is that not only you use the database but all employees of your company in on-line mode. This helps to store all data relating to clients, including history, and always keep updates their contact details. Use settings to set who will see this or that field or table.
So, let’s add one employee to Employees table and send him an invitation to work in the system. Enter “Clients” category, then “Employees” table. Click “+ New Employees” button.
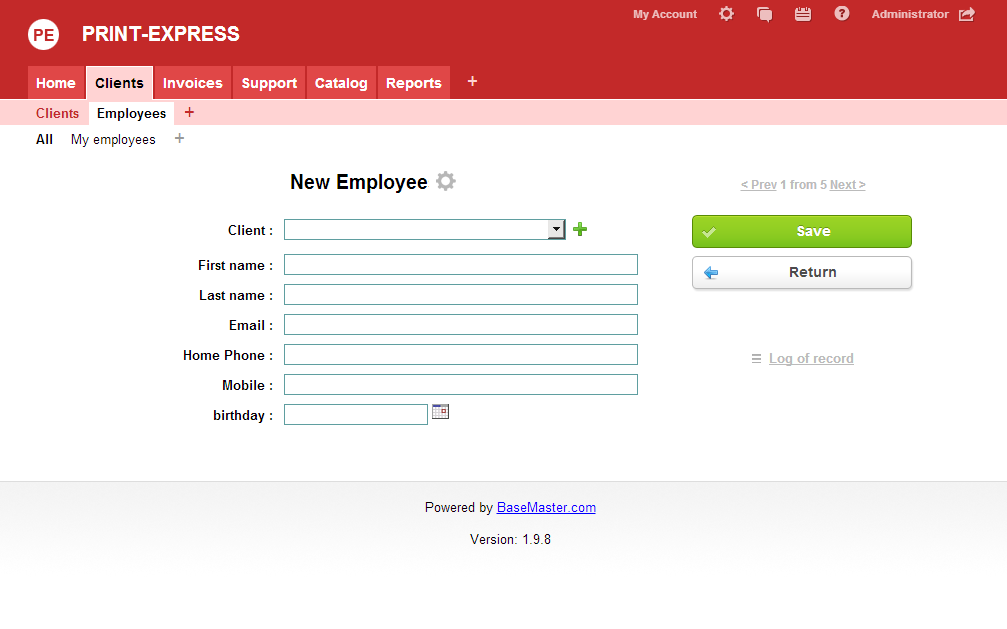
Complete all the necessary fields. Be careful when completing e-mail field: the user of this e-mail will get an invitation letter containing all data required to log in the system including the login and password which the system will automatically create and insert in the invitation.
Select Access group for the employee. In the standard configuration, the are three groups: Administrator, Clients and Managers. Administrator users will have full access to the data base as well as to its settings. That is why we recommend to use the group only if necessary. Managers users can add clients and issue invoices, nit do not have access to the settings. Clients users do not have rights to change settings as well. Their settings can be tuned for each table (starting from the visibility for a user and through extended access rights). According to default settings, you have admin rights.
Pay attention to Extras group of fields: you can enter information about your employee here to create an up-to-date data base about your personnel as well as information about his/her salary/wage. For example, Bonus field is linked to Sales report and influences the final amount contained there. Enter the percentage of the bonus which will be granted to a manager. The amount will depend on payments made under invoices issued by this manager.
After you save the record, the new employee will get a letter containing the address of the system, login and password.
Once the letter is received and the employee entered the system, he/she will see changes you made and will be able to make his/her own changes depending on the relevant rights.
Note. In the free version of the program it is possible to add two extra employees apart from the admin.
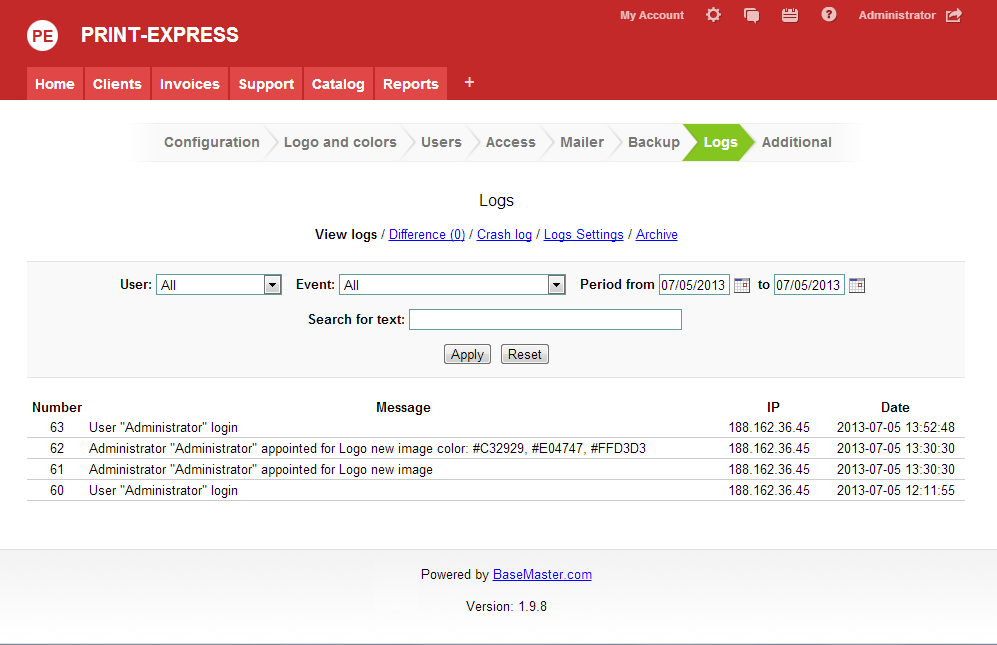
Logs
To track user actions, the admin can use Logs feature contained in Settings (gear icon in the top right corner). Logs show the users who entered the system as well as users who added or edited the records.
Congratulations! You’ve accomplished the 1st lesson.
Today we saw the interface of the program and learned how to add employees and clients. Now you can create any online databases using Basemaster. So, that is all for the 1st lesson. You've made 1/12 on the way to studying the capabilities and features of the program.
Task. Add some of your companies manually (in the next lesson we will learn how to automatically import all your clients) and one employee. Ask you employee who was invited to work in the system to add several companies in “Clients” table.