
In this lesson, you’ll learn how to create tables using the Basemaster app, and how to edit their structure: categories and fields. It will help you to tailor the online CRM for your business needs.
Every company has its own way of conducting business. We tried to take into account and anticipate all your needs and requirements and embed them our app. So once the app is up and running you might need to add some extra tables as well as separate categories and fields. That is why this app has a feature which will help you to do it.
Prepare the requirements list
Before you start adding or editing any tables or fields, scrutinize your business processes you are going to computerize using our online CRM. You should define which tables you need, in which way they will be interlinked (which relations have to be set) and which fields are necessary. Besides, you should clearly imagine which fields’ values and conditions will be used as key data for search and selection of information from the tables. It'll help you to create the optimized and effective database structure. We recommend that only after performing these steps, you may start customizing the online CRM.
Let’s analyze the following example. Say you want to keep tabs on clients' orders. For this purpose, you need to have a table which contains orders' details, including date, number, client’s name, and amount. If you already created a special database and filled it with clients’ names, normally each time you will simply select the required client from such table (named "Clients", for example). Each order may include several items related to products or services booked. This scheme is implemented in our online CRM via subordinate tables (or subtables). You can select the required record in the parent table and insert it in the corresponding subtable. Once the order is added, select the relevant items from it. The amount of your order will be given as the sum of items selected. Select items (products or services) from the price-list and specify their quantity. The price will be automatically multiplied by the quantity, and the final amount will be given. Using order dates, you can select several orders to analyze them or prepare reports (for example, orders placed during the past month/quarter).
As you see, we’ve defined the procedure of placing orders and briefly described you business process. Now let’s get down to customizing you system.
Create category
Create a new category by clicking "+" on the right side of the existing categories' tabs and name it "Orders".

Then enter its name in the field "Category name" and provide short description in the field "Category help". All information about your categories, tables and fields will be saved in our online database as content of the "Help" option of the customized version of your app. Besides, these data will be shown below each table you open.
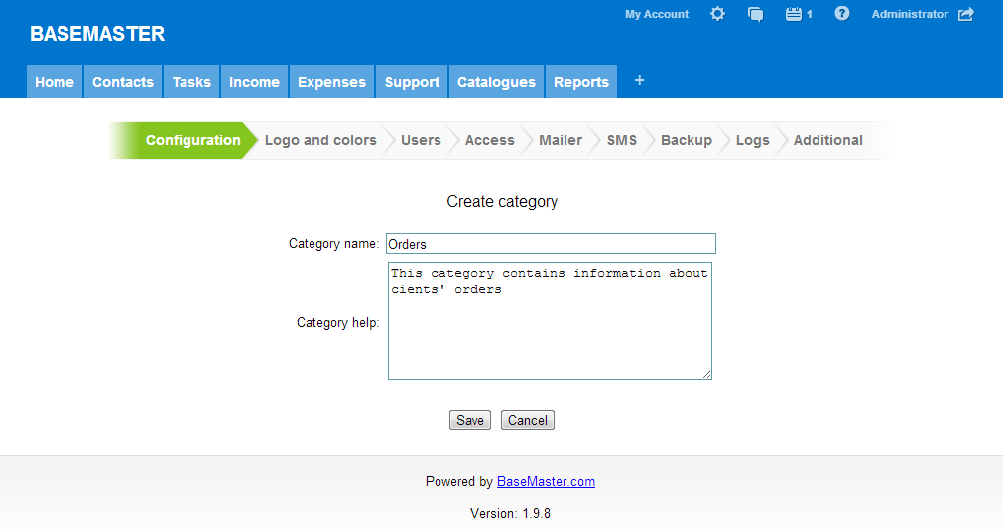
Then click the "Save" button.
Create table
Now you can add a table in the new category. Click the "Add table" button.
Let’s name it "Orders" as well.

Here you can enter the following input data: name of the table (can be long), name of the button which adds a row to the table, and title of the row. Furthermore, supplement you table with calculation (rules), if necessary.
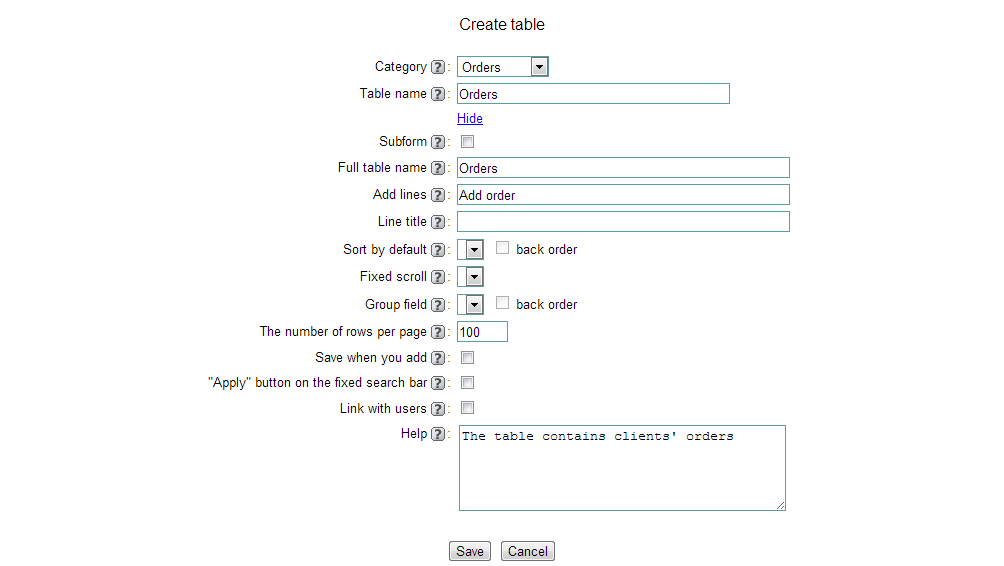
The following options: "Sort by default”, "Fixed scroll" and "Group field” – will be available when you added the fields in the table. Make changes and click the "Save” button to save them in our online database.
Adding fields to the table
After the table is created, you will see that it already contains 4 system fields: ID (shows the number of record in the table), Added by (shows the user who added the record), Time (shows the time when the record was added), Status (this is a drop-down list that shows whether the record is active, archived or deleted). These fields are created automatically for each new table in our online database.
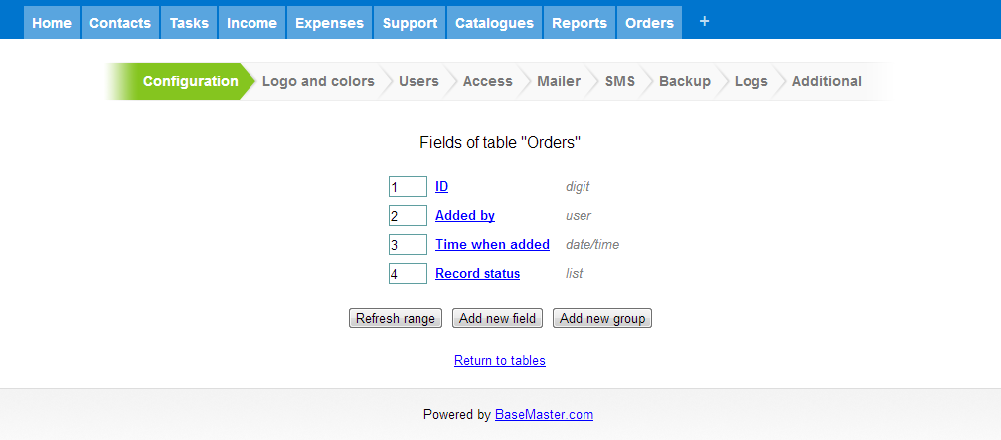
All system fields are filled by default. They are usually used to set conditions, filters and calculations. For example, the system fields may be helpful when you need to select records for a particular period of time or make available for the user only those records that have been added by him/her.
Now you should set the fields to be added to the table. First of all, create a numeric-type field and name it Number. This field will show the index numbers of the goods. Set the type of the field – numeral. The parameter Decimal sets the number position and decimals. For currency formats you should type 10/2.
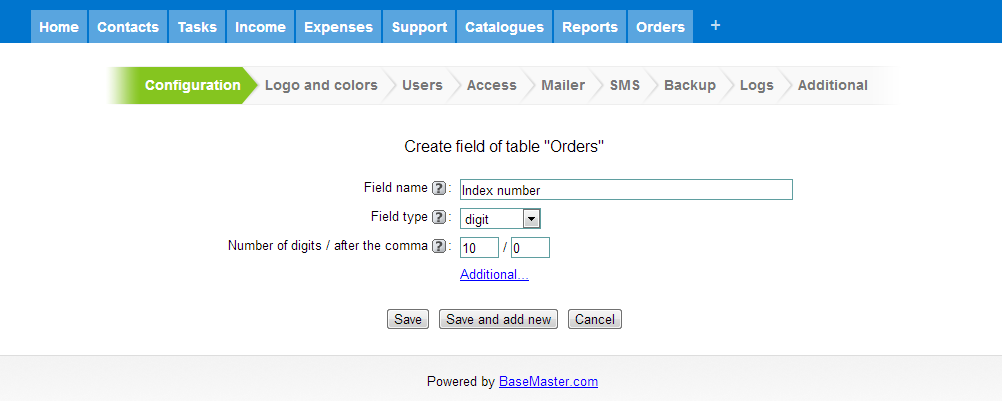
If you click "Additional..." the following parameters of the field will become available:
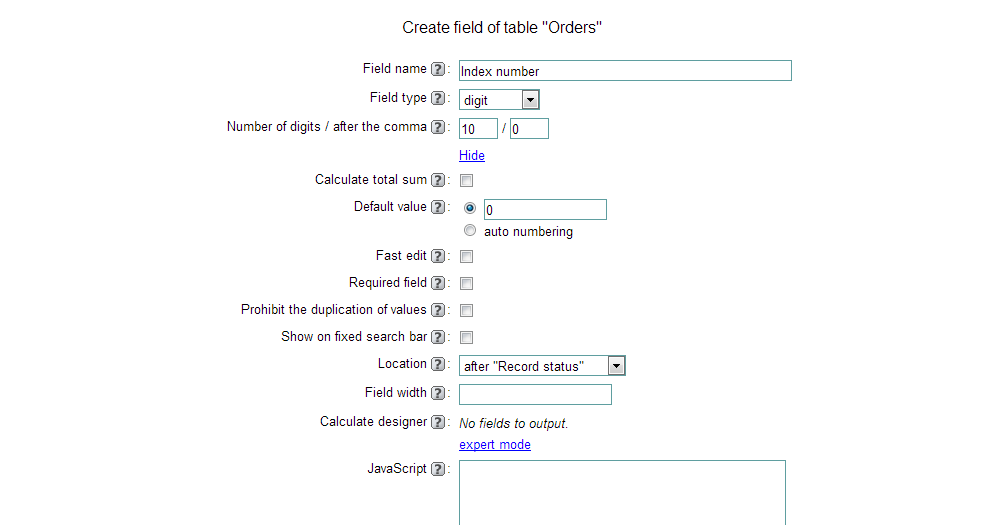
"Calculate total sum" – this option shows (at the bottom of the table) the sum of values from all records in the table.
"Default value" – if you select “auto numbering” and add a new record to the table, this field will be filled with the next sequence number. In our case select this option so as the numbers assigned automatically.
The following parameters are common for all types of fields:
"Fast edit" – this parameter allows you to edit fields right in the table without switching to the record view mode.
"Required field" means that this field must be filled. If the user does not complete this type of field, a message will be displayed requiring to complete it and proceed. During adding or editing, this type of fields are marked with red “*” symbol.
"Prohibit the duplication of values" – this option excludes the use of similar values in the field and makes it unique. For example, Name field in Clients table in the standard configuration is unique. You can identify the customer by using the name of the company. So, this will help you to avoid mixing names of companies that would be inevitable if the online database contained two companies with one and the same name. Do you agree that this feature should be implemented in any online CRM?
"Location" – this option is intended for setting the position of this field. If you do not use this option, then all field in the table will be shown in the same order as they were added.
"Field width" – set the width of the field in pixels.
"JavaScript" – using JavaScript you can set actions to be performed with other fields of the row as well as preset links with other tables. This option is used when you need to create fields for calculations. Let’s take the following example: you set the width, height and length of the room, and then the field shows you the required power of the conditioner. This option is very useful for call-center managers for making and registering the obtained calculations.
"Field-level help" – description of the field including its function and properties.
Now let’s create Orderer field. Do it in a way so that orderers could be selected from Cleints table. For this purpose, select link type for this field. This kind of field links two fields of different tables. Once the initial steps are done, select the table from the list that is to be linked (in our case this is Clients table), and then select the field from this table (in our case this is Company name).
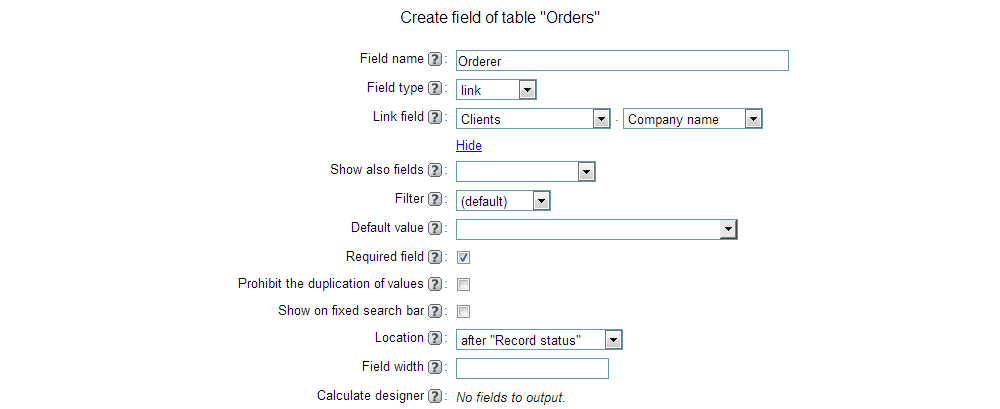
Now when you add new records to Orders table, Orderer field will be a drop-down list of companies taken from Clients table.
Let’s proceed with other parameters of link-type fields.
"Show extra fields" – select an extra field from the linked table to display its values together with the linked field. You may need this option for speeding up the search for the required value. For example, in a big company sometimes it is easier to identify employees not only by their second names but also using their positions in order to avoid mixing up namesakes. In this case the drop-down list of linked fields will also show the list of employees with their positions.
"Filter" – set the filter for selecting values from the linked table. We will study filters in more detail in Lesson 7.
You can enter complete "Default value" field after saving the changes.
Click "Save".
Now, create Order date field of the date/time type.
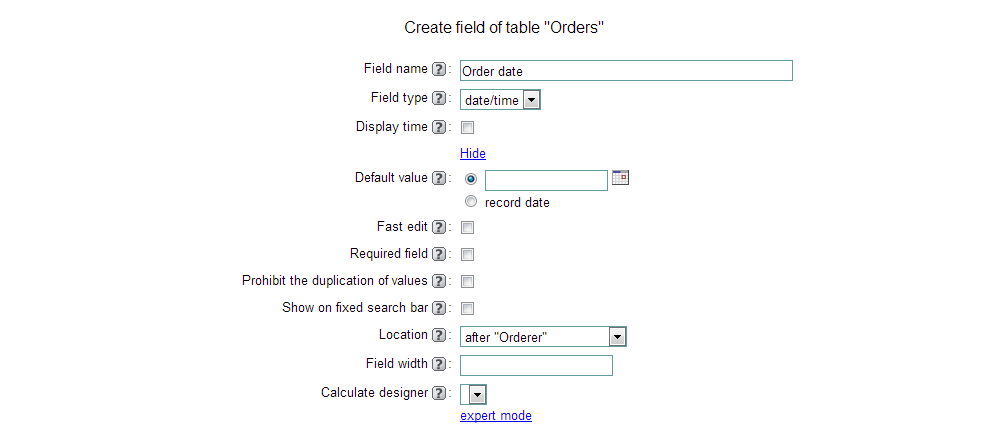
Date/time type has the following parameters:
"Display time" - this option switches on the time which will be shown in the field.
"Default value" – switch on this option if you need this field to show the date of recording the order in the online database. You can change this date while adding/editing the order.
Let’s add Sum field to the table.

After it, amount of order will be created automatically by summing up amounts of all items of the order. These functions are implemented in our program by calculation methods which we will consider in more detail a bit later.
So, the Orders table is ready.
Now let’s create Price-list table from which items of the order will be selected.

Add Item name field (Text type) which will show the name of item in the order.

Parameters of Text-type fields:
"Multiline" – use this option to set whether the text will be entered in one or several strings.
"Hyperlink" – use this option to turn the text in the field into a hyperlink. You may need to apply this option to fields which contain, for example, web-sites or e-mails of your customers. By clicking this link you can access a web-site or open a mail agent.
"Display HTML tags" – this option switches on HTML-tags contained in the text (prepared for a web-page).
"Default value" – here you can specify the value which will be automatically assigned to the field when entering a new record.
"Do not cut in the table" – if the field contains a large text, the cell will be extended so that the whole text could be displayed. Otherwise, you will see only a part of the text and “>>” symbol.
In our case, "Item name" field should be mandatory, because entering the product in the online database without any name does not make sense.
Now add "Units of measure" field. It will contain units of measure of the goods. It is easier to select them from the list.
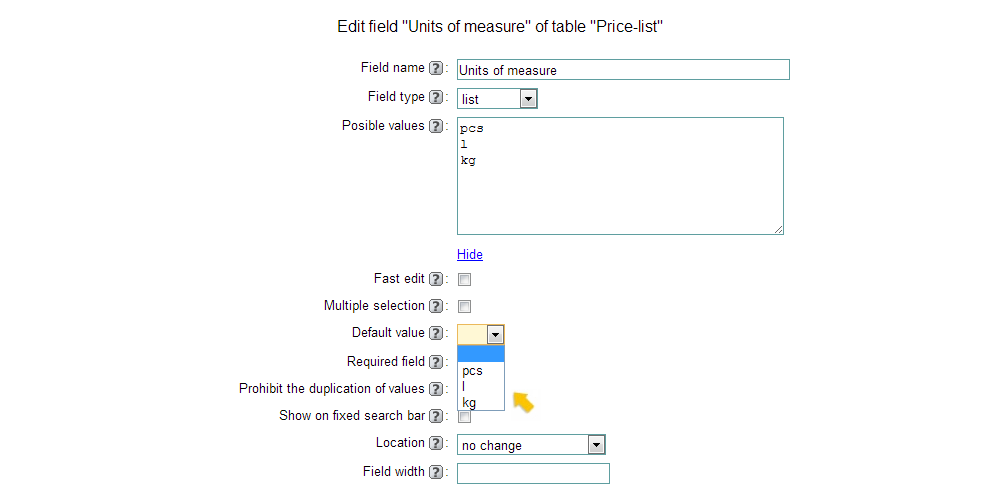
Use list-type fields when it is necessary to select one or more ("Multiple selection") values. When you enter or edit a record, select the value for the list-type field from the drop-down list. Let’s enter possible units of measure in the list of values. If you save the settings of the field and then open them again, it will be possible to select a default value from the list. This value will be assigned to "Units of measure" field right after you enter a new record. If you product is measured in pieces, then select “pcs” and click Save.
Now add Price field to the Price-list table in our business online database. Price field will contain the price of one product.

This is a currency format, that is why it is necessary to specify 2 decimals.
"Price-list" table is ready and saved in our online database.
Creating a detail table
Now it is time to create Order items table.

Put the mark that this table is detailed. When you add fields to the newly created subtable, make sure that you link it to the main table. In our example Order items table must be linked to Index number field of the Order table.

Add Name field. The value of this field should be selected from Price-list table. It means that the field must be the link-type.

Now when you enter or edit a record, this field will show a drop-down list of names of the goods from Price-list table. Click "Save and add a line".
Add "Units of measure" field. This will be a list-type of field like the one in Price-list table.

Then let's create Price field.

To make Units of measure and Price fields automatically take the values from Price table it is necessary to prepare calculations using Calculatating Wizard. We will consider it in the next lesson.
Now let’s add Amount field which will contain the required amount of the goods.

The final field is Sum. The value of this field should be calculated automatically. For this purpose, use Calculating Wizard. We will learn how to prepare simple calculations a bit later.

So, we created all the necessary fields required to track orders. The only thing that’s left is to set the relevant calculations in tables, but now we already can check how records are added to new tables.
Entering data to new tables
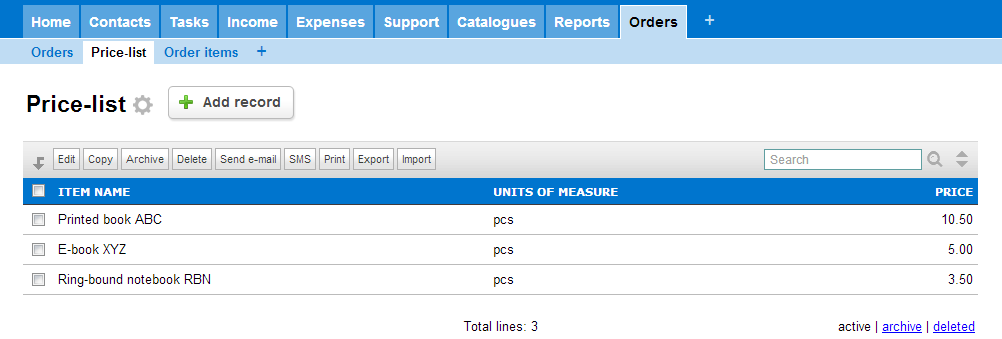
At first we have to fill the Price-list table. Let's find it in Orders category and add some records.
Now you can add an order to Order table. Orderer field will show the list of companies from Clients table. Select a random company.
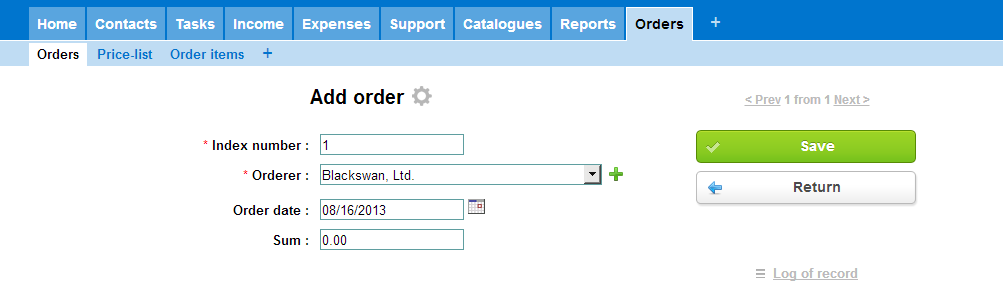
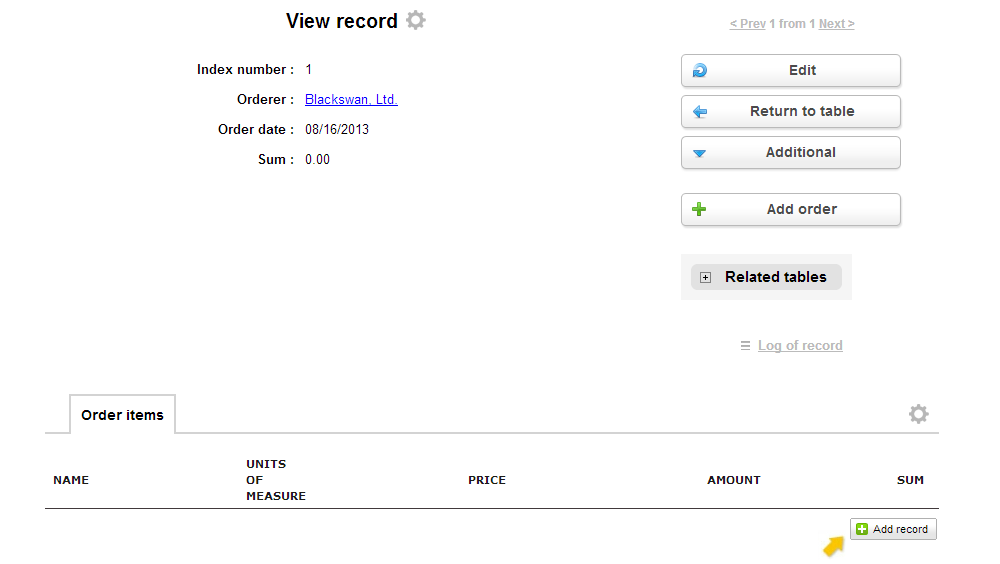
The date of the order is the current date (assigned automatically). You can change this value by clicking a calendar located at the right. Click Save. Now you can see Order items table. To add a record, click Add record.
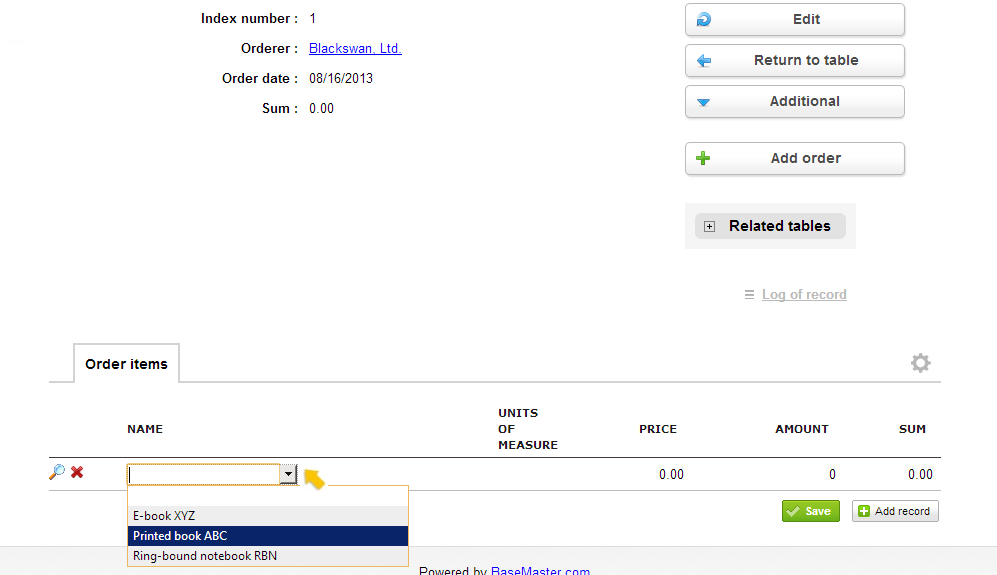
So, now you can select the name of the relevant product. To do it, point the cursor to Name field and select the required product.
If you need the remaining fields work appropriately (automatic insertion of units of measure and prices as well as automatic calculations), you should set the calculations for these fields.
So, we created three tables for storing customers’ orders and learned different types of fields. Now you know how to build tables in our online database. Besides, you can now link different tables and learned what subtables are intended for. Such things may be very useful to tailor the online CRM for business process. In the next lessons we will supplement our tables with simple calculations which will help us to make the process of tracking orders fully automated.
Task. Add user-type Manager field to Orders table so that each order could be linked to the particular manager. Besides, add list-type Status field which will show the current status of the order and will take New or Finished values.